Proxmox 6.2
Table of Contents
Todo
** !! page under construction !! **
Introduction
I’ve had enough to break my system because of an outdated library which is not compliant with a new software and/or service. Moreover, every softwares doesn’t provide a virtual environment. That’s why I decide to install Proxmox VE.
Proxmox VE (Virtual Environment) is a powerfull open source plateform to run virtual machines (KVM) and containers (LXC). It is an OS based on Debian.
Virtual machines
All virtual machines are independant each others. Each are installed on a virtual disk partitionned in LVM (see more details on the page).
Note
I first installed a light Linux OS (Debian in my case) as a vitual machine and used it as a clone for my others OS.
Debian installation
I choose to install a debian (netinstall). There is a small disk image without graphical desktop.
Install Proxmox VE
First, install the Proxmox VE.
Installation of this environment is touchy, specialy the network. Follow carefully this tutorial step by step to avoid some mistakes which could lead to an unwanted behavior.
Network architecture
The goal is to redirect all incoming network towards the pfsense virtual machine. This pfSense virtual machine is in charge to filter the traffic towards different virtual machine (Web server, Nextcloud, …). Once pfsense is installed, the Web interface of pfsense will reachable only via its LAN address. Thus, a virtual machine should previously been installed into the LAN.
Todo
** !! Explain here with a schema the network. !! **
Network configuration
Server is composed of 2 network boards (see file /etc/network/interfaces in the extract below). Only enps5s0 is used for the network. Of course the second board can be used. enps5s0 is set in manual, without any address because is is configured (bridged) by vmbr0. All the external traffic will passed through this interface before to reach sub-network.
Proxmox VE web interface will be accessible by vmbr0 too. In the configuration below, it is 10.255.255.79.
auto lo
iface lo inet loopback

iface enp5s0 inet manual
#up route add -net xx.xx.xx.xx
#netmask 255.255.255.224
#gateway xx.xx.xx.xx
#dev enp5s0

iface enp3s0 inet manual

auto vmbr0
iface vmbr0 inet static
address 10.255.255.79
netmask 255.255.255.0
gateway 10.255.255.76
bridge-ports enp5s0
bridge-stp off
bridge-fd 0
A new interface vmbr1 will be added to the Proxmox VE. This interface will be a bridge to link the Proxmox VE with the entry point (WAN) of the pfsense virtual machine. The IP of the pfsense WAN will be 10.255.254.2. This will made a first virtual network composed of only 2 IP address. Thus, for safety reason in order to minimize the network, the mask will be 255.255.255.252 (30).
auto vmbr1
iface vmbr1 inet static
   address 10.255.254.1
   netmask 255.255.255.252
   bridge-ports none
   bridge-stp off
   bridge-fd 0
   #WAN
Prerequisite before pfsense installation
pfsense will be configured thanks to a Web interface. But once pfsence is installed, the subnetwork that contains all virtual machines will be isolated from the internet. Thus it is advise to download and installed a virtual machine with a graphical environment before to install pfsense. It is easyer to make that when Proxmox VE is installed with 2 network interfaces: the real physical (enp5s0) and the virtual interface (vmbr0).
Creation of the LAN
Another interface vmbr2 is added. This interface will be a bridge to link the Proxmox VE with the second sub-network that is composed of all virtual machines.
auto vmbr2
iface vmbr2 inet static
   address 10.255.253.1
   netmask 255.255.255.0
   bridge-ports none
   bridge-stp off
   bridge-fd 0
   #LAN
Proxmox VE network configuration
For the moment, all virtual machine are reachable directly from the Proxmox VE. It is a little bit frustrating because the goal is to access to the virtual machine thru the pfsense. This could be verify by making a ping from the Proxmox VE server towards a virtual machine and revert. In both case a response is received.
We will hence create a file containing some iptable rules.
A file containing the routing is store into the Proxmox VE server. This script should be executed once the vmb2 interface is up.
auto vmbr2
iface vmbr2 inet static
   address 10.255.253.1
   netmask 255.255.255.0
   bridge-ports none
   bridge-stp off
   bridge-fd 0
   #LAN
   post-up /path/routing.sh
#!/bin/sh
#/path/routing.sh

## activate IP forwarding
echo 1 > /proc/sys/net/ipv4/ip_forward

## redirect all LNA packets (10.255.253.0/24) towards the pfsense WAN (10.255.254.2)
ip route change 10.255.253.0/24 via 10.255.254.2 dev vmbr2
Proxmox configuration
By default, Proxmox uses Thin Provisioning as storage support. With thin provisioning activated, only the blocks that the guest system actually use will be written to the storage.
Note
Say for instance you create a VM with a 32GB hard disk, and after installing the guest system OS, the root file system of the VM contains 3 GB of data. In that case only 3GB are written to the storage, even if the guest VM sees a 32GB hard drive. In this way thin provisioning allows you to create disk images which are larger than the currently available storage blocks. You can create large disk images for your VMs, and when the need arises, add more disks to your storage without resizing the VMs’ file systems.
Note
The physical device called /dev/sdc will be added to the server.
First, create a physical volume:
pvcreate /dev/sdc
A new group volume is created over the physical volume. To create a new group:
vgcreate vg500 /dev/sdc
Then, create a logical volume that will be used for VM storage. It must be of type thin-pool:
lvcreate -L 440G -n lv500 vg500
finally, convert it in thin pool:
Note
lvconvert –type thin-pool /dev/vg500/lv500
The new volume is now available into Proxmox interface (menu ):
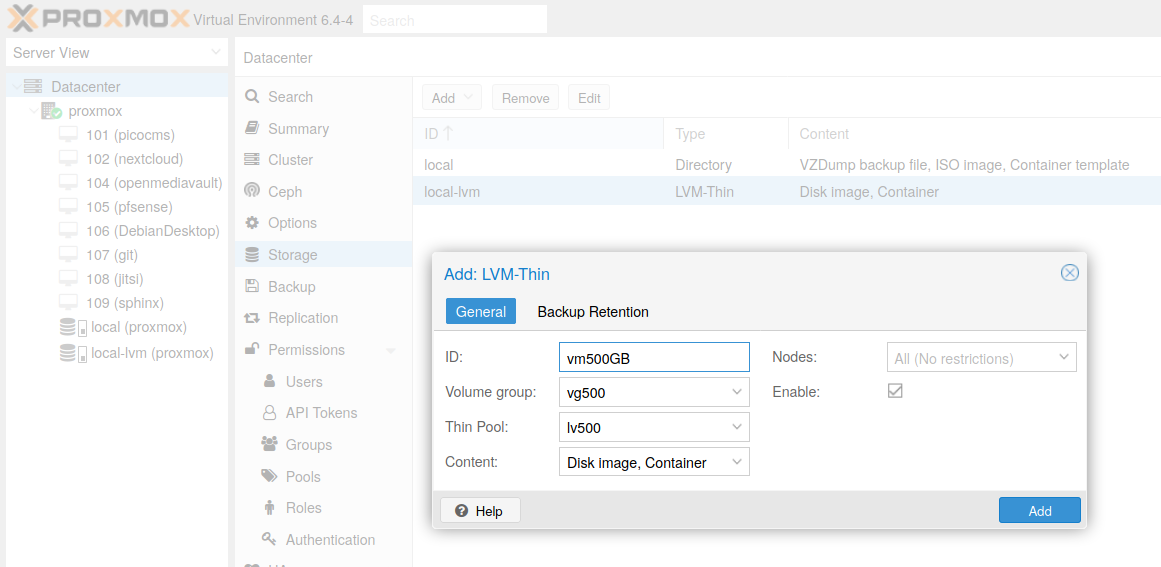
Fig. 1 New LVM-Thin
When VM will be available, they can be moved on the new volume:
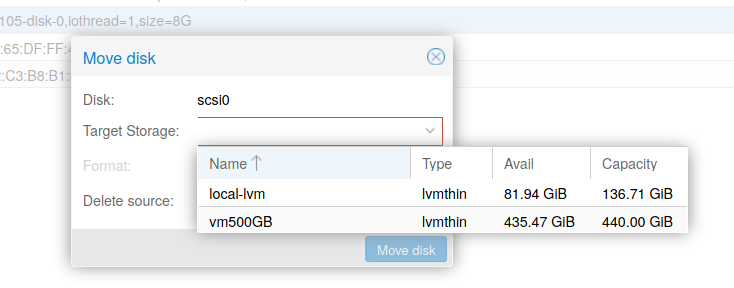
Fig. 2 Move the VM
Virtual machines
Get an ISO image
Connect to Proxmox (see Fig. 3), enter login and password. login must have enough write access to create a VM.
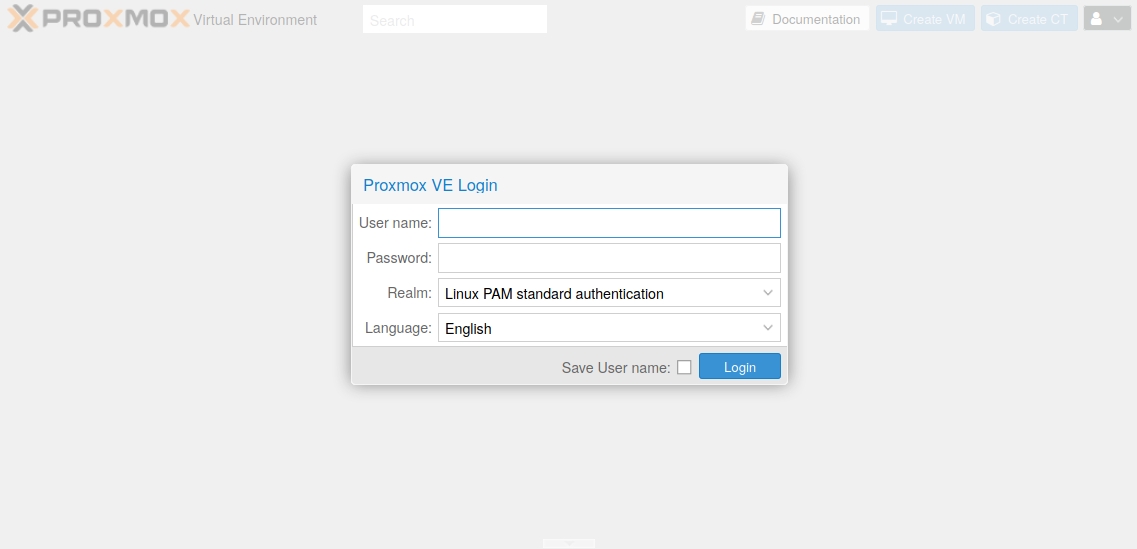
Fig. 3 Proxmox login
We should have to download a netinstall image of Debian in the folder used to store iso image:
cd /var/lib/vz/template/iso/
wget https://cdimage.debian.org/cdimage/bullseye_di_alpha3/amd64/iso-cd/debian-bullseye-DI-alpha3-amd64-netinst.iso
Once the image is dowloaded, don’t forget to check the checksum which must be the same than the one computed on Debian server:
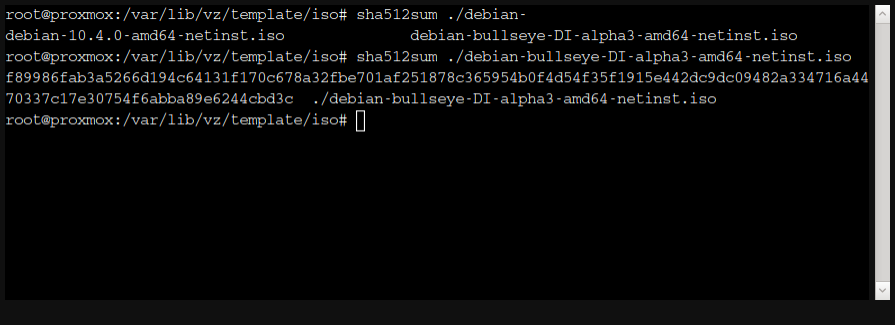
Fig. 4 Compute the checksum
The image is now available in the Proxmox interface and will be mounted in the VM to install it.
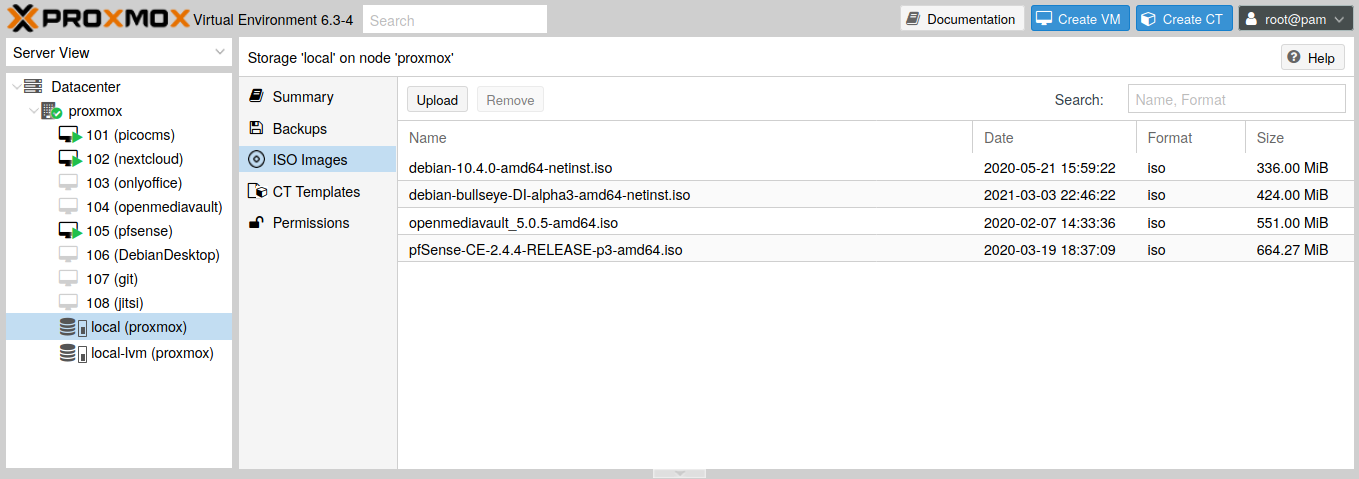
Fig. 5 List of available images
VM configuration
In the main interface, create a new VM (see Fig. 6) with a unique VM ID and a name.
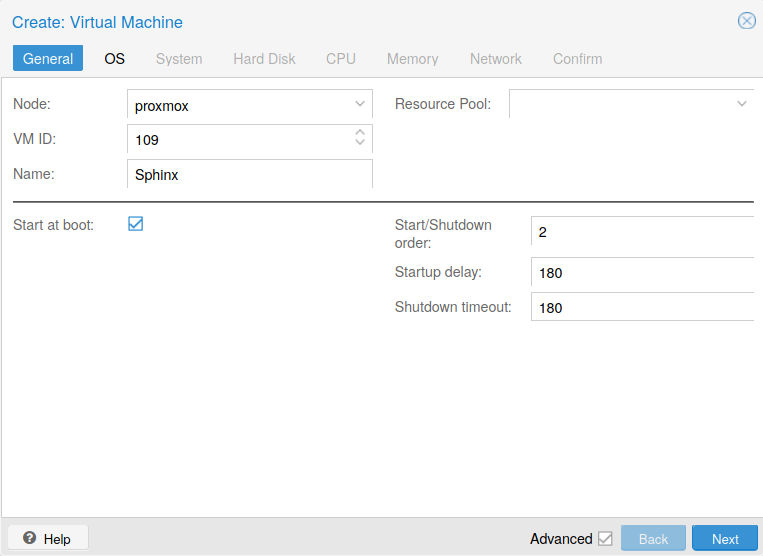
Fig. 6 Create a new VM
If the Advanced box is checked, more options are available:
Start at boot: to start the VM when the Proxmox server is power-on
Start/Shutdown order: set the order order to start this VM according the order of other VM
Then, clic on Next bouton to select the OS and the image with the VM will boot. Set Use CD/DVD disc image file (iso) to select the image used to boot.
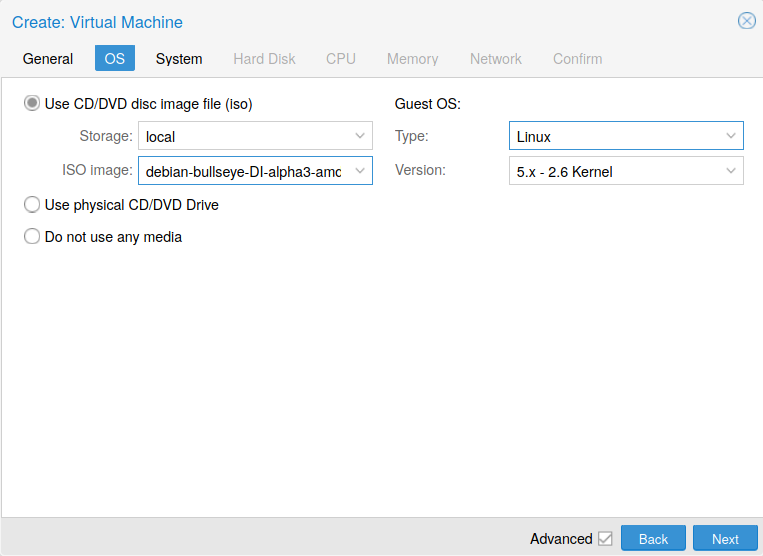
Fig. 7 OS of the VM
In the System sheet, select the VirtIO SCSI single as the support to install the VM.

Fig. 8 System
Note
Check the Qemu Agent. This option allows to have access to informations about the VM. It is also possible to shutdown the VM thanks to this agent (IP address).
In the Hard Disk sheet, select the Bus/Device and set the support size. Of course, the size of the support depends of the usage. For this VM without graphical interface and where a Web server is running, a size of 16GB is enought.
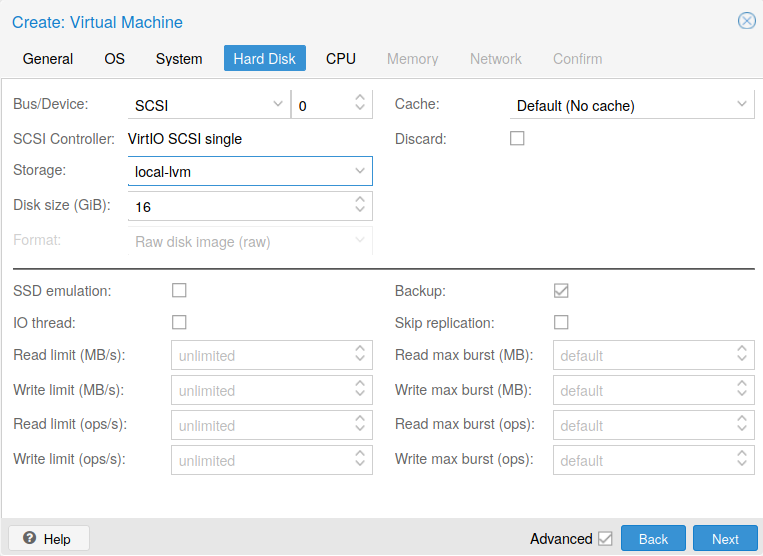
Fig. 9 Hard Disk configuration
Note
As support is a logical volume, the size could be adjust if nedded.
The next sheet (see Fig. 10) is for the CPU configuration. For this Web server, one core and one socket is enough. Don’t forget that these ressources are the one of the host (Proxmox). These ressources should be shared through all VM.
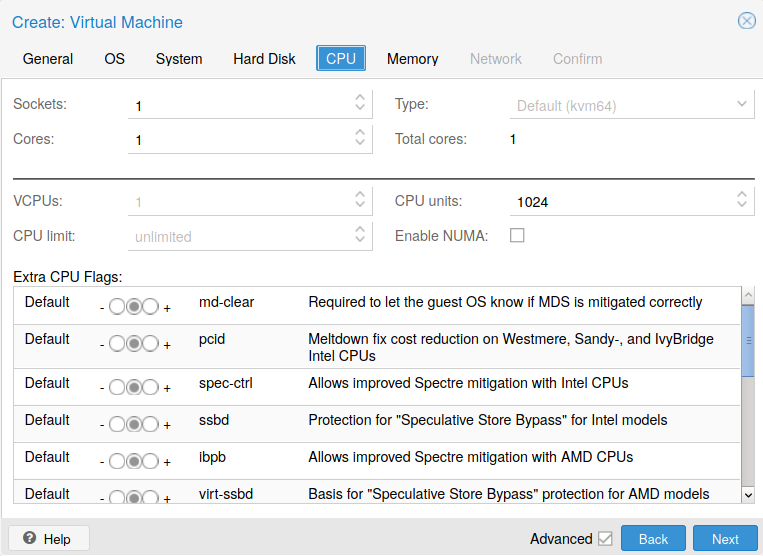
Fig. 10 CPU configuration
The next sheet (see Fig. 11) is for the Memory configuration. A size of 1GB is also enough for this tiny Web server.
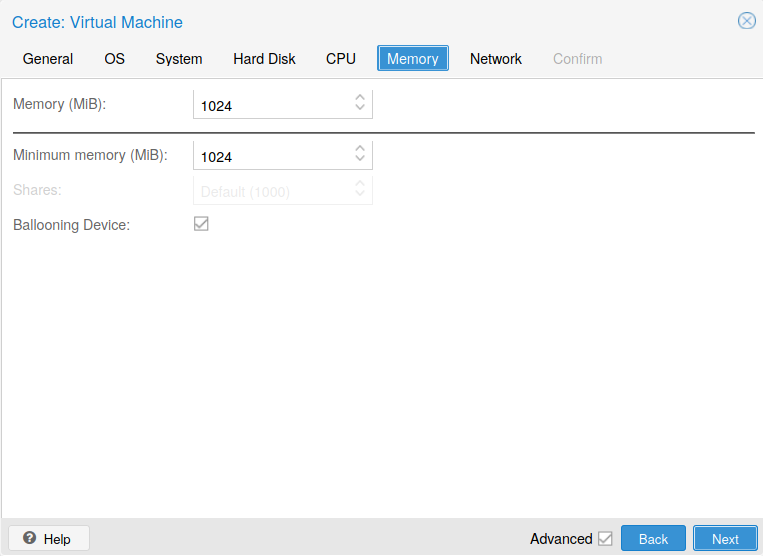
Fig. 11 Memory configuration
The last sheet (see Fig. 12) is for the Network configuration. Be careful to select the proper LAN interface in the Bridge drop-down combobox. This interface should be the internal LAN. The Model could be now VirtIO (paravirtualized). Previously, this model should had been replaced by another type.
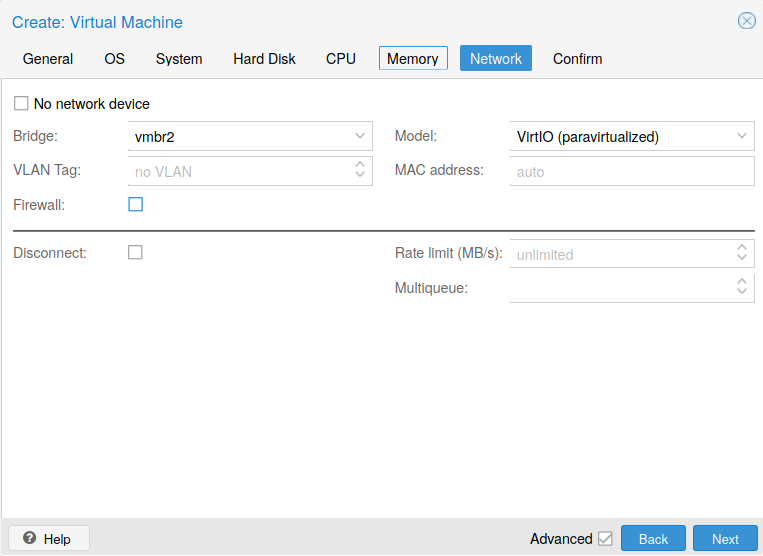
Fig. 12 Memory configuration
Finally, Confirm all settings …

Fig. 13 Confirm button
… and then the VM is now in the Proxmox server.
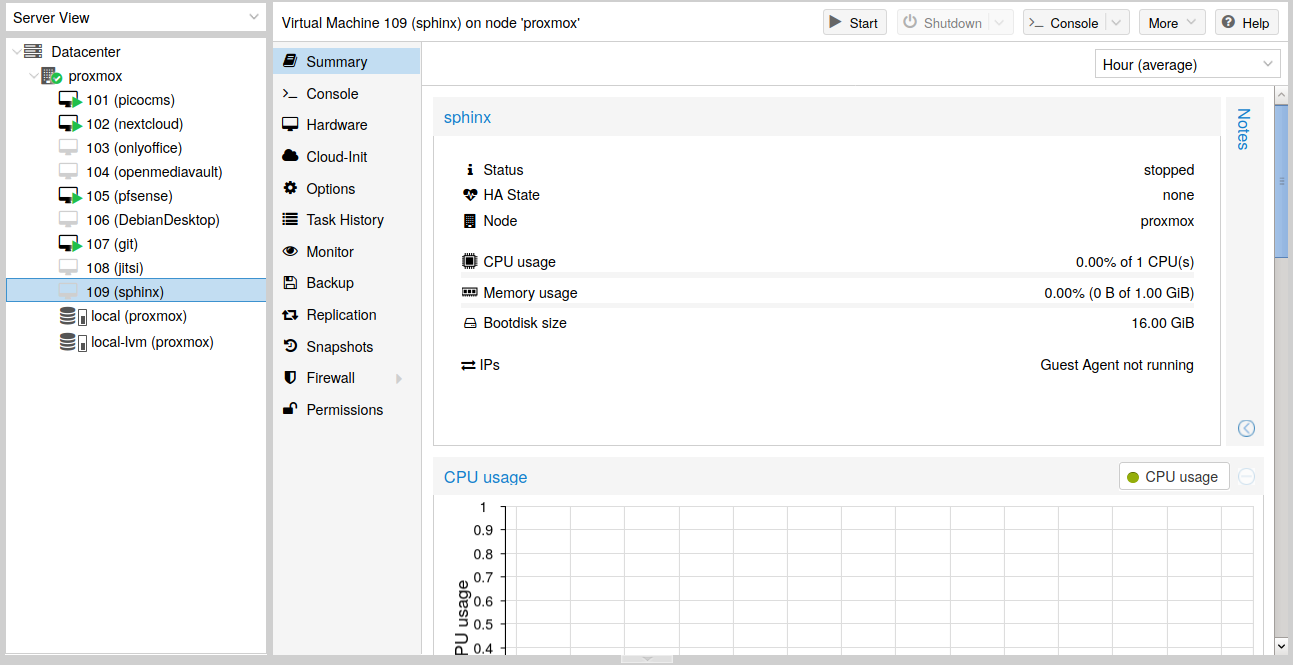
Fig. 14 New VM in Proxmox
A serial port is added to the configuration. It’s allow to communicate with the VM with a better terminal (xterm.js):
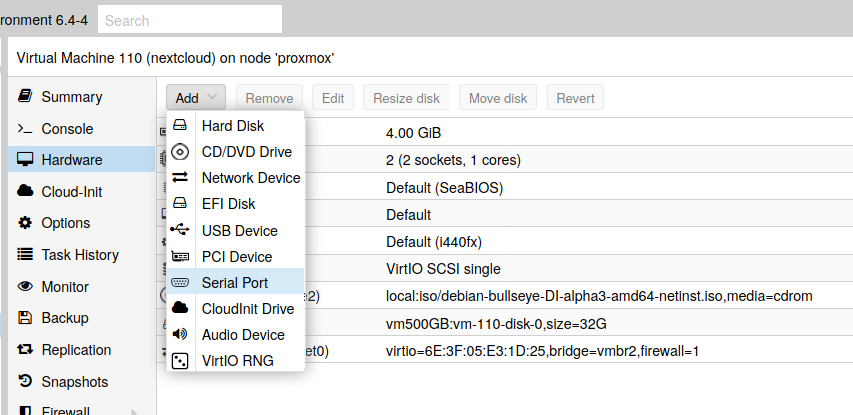
Fig. 15 Add a serial port
Once the VM is running, open the grub configuration file …
sudo nano /etc/default/grub
… and update the command line with:
GRUB_CMDLINE_LINUX="quiet console=tty0 console=ttyS0,115200"
Finbally, update grub:
sudo update-grub
VM installation
After to boot the the VM, the VM install can start (see Fig. 16).
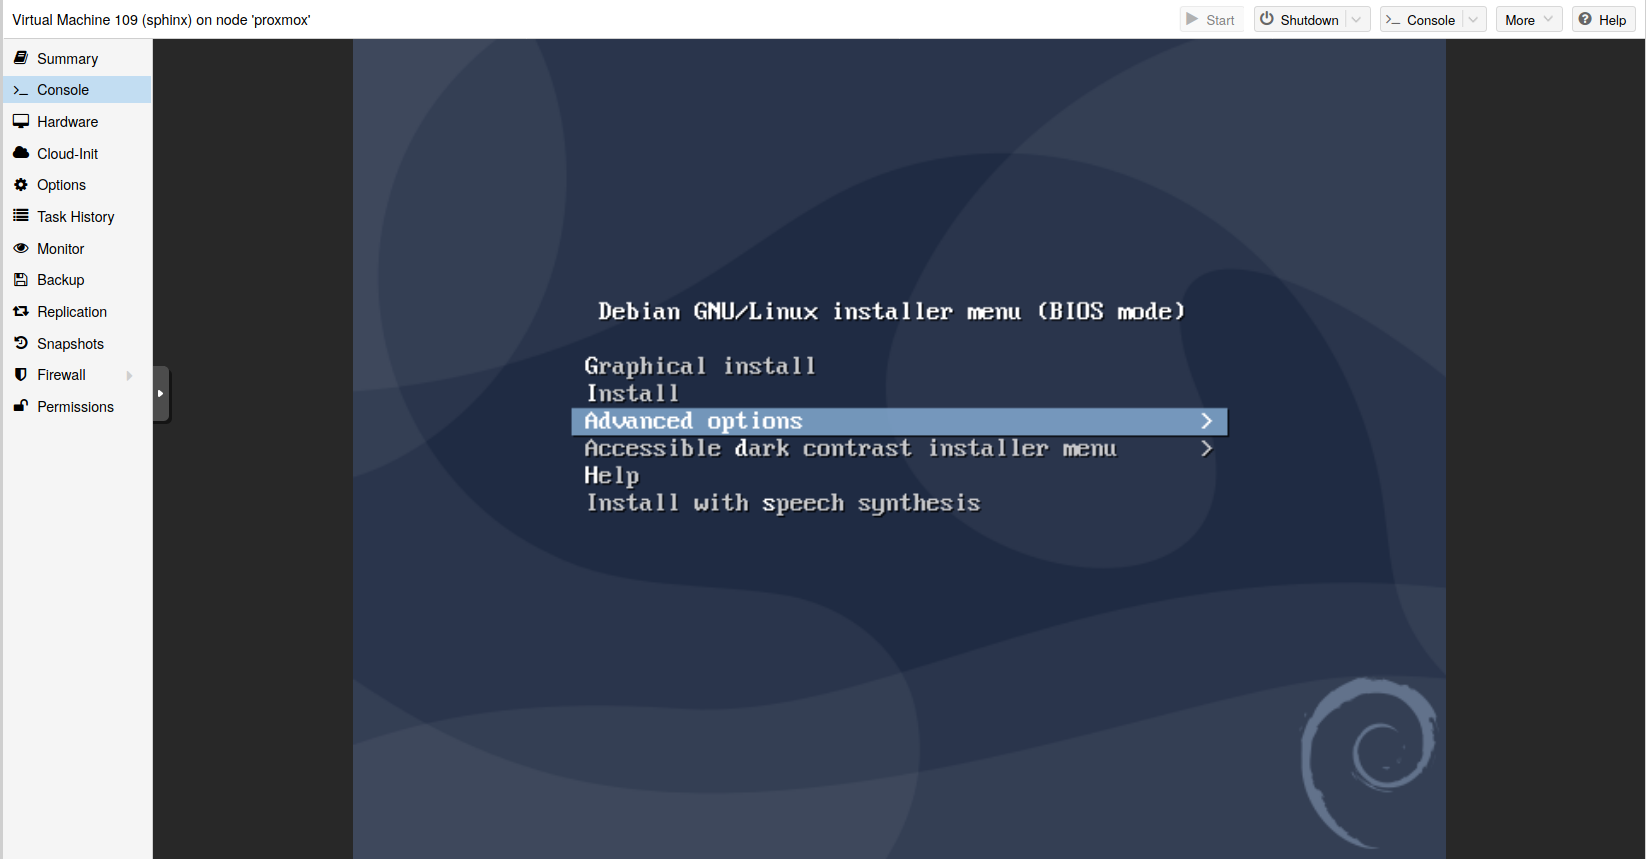
Fig. 16 VM install
The install is the same than a real machine. The next figure (see Fig. 17) is about the choice of the kernel.
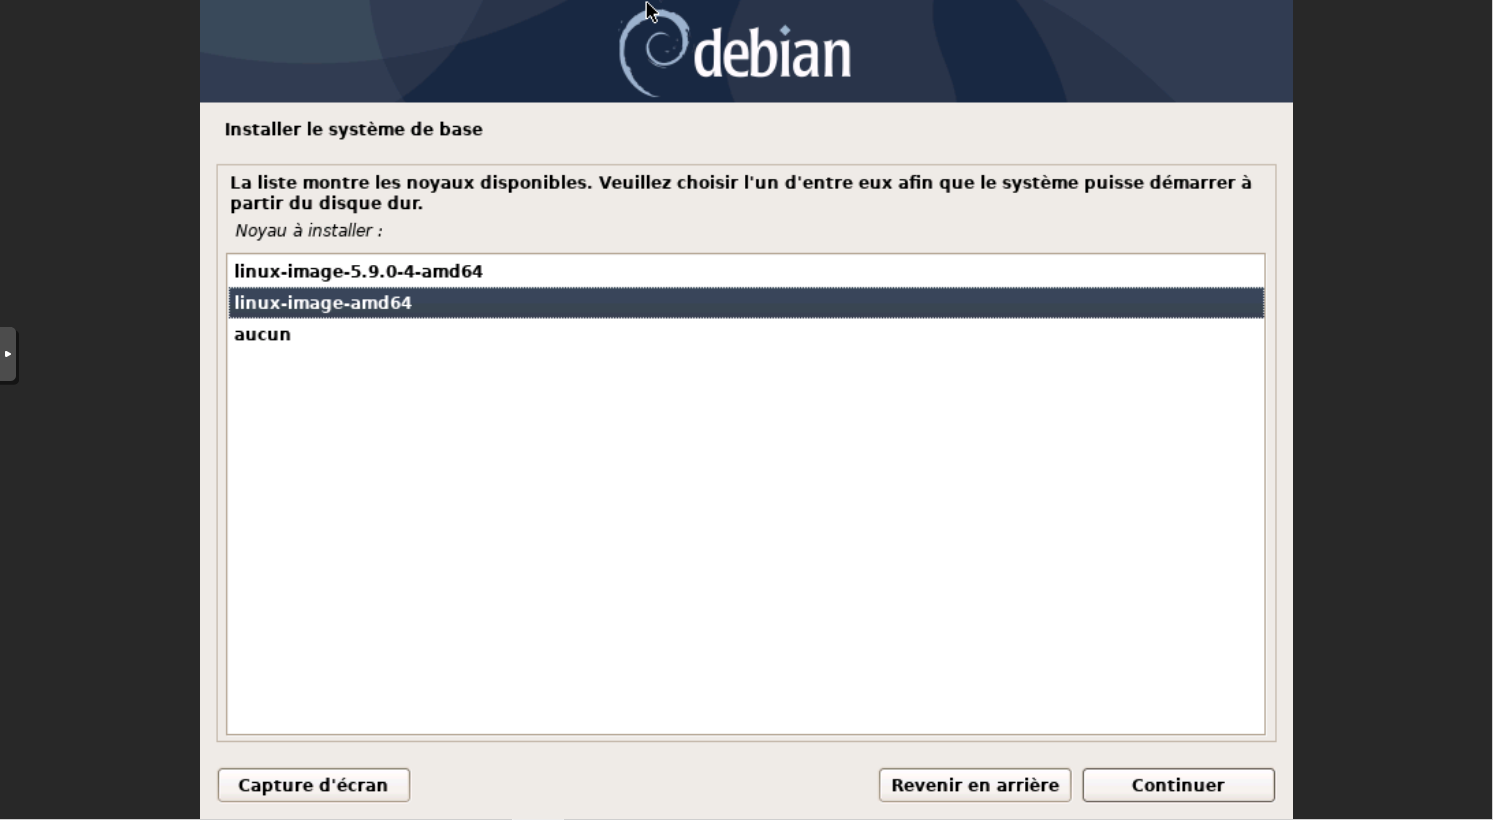
Fig. 17 Kernel choice
Note
qemu-guest-agent seems already installed inside the VM with the last Debian image.
Tips
To change the name of the Proxmox server, update the name of the host (file /etc/hosts and the name in the hostname (file /etc/hostname) with the new name. Reboot the server. At this step, all VM are not viewable.
Reboot the server.
But once the server is up, all VMs are bot available. The reason is that their config files are stored into the path of the previous hyperviser. Thus, all VM config files should be moved into the new path.
For VMs:
mv /etc/pve/nodes/old_hostname/qemu-server/* /etc/pve/nodes/new_hostname/qemu-server/
For containers:
mv /etc/pve/nodes/old_hostname/lxc/* /etc/pve/nodes/new_hostname/lxc/
Bibliography
- Date
2021-04-23 23:00
- Tags
pfsense, proxmox, computer, virtual machine, apache, certificate
- Authors
Gibus